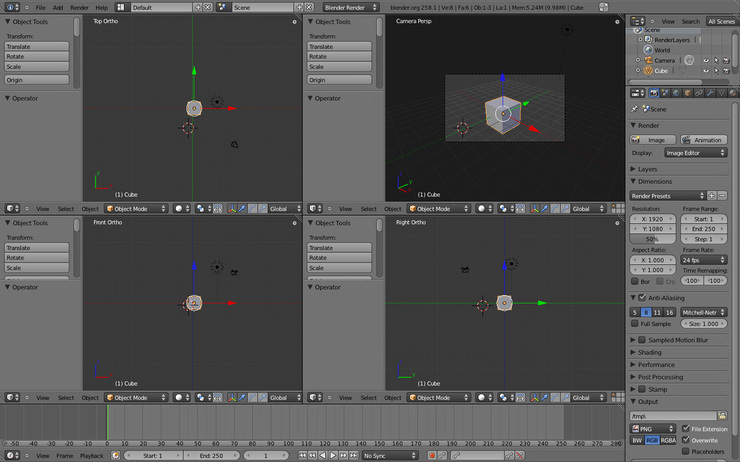
This shows the viewports created in Blender. It introduced how to pan around the screen and scroll using the buttons/panels. This exercise also introduced how to change the window types, center the view on a certain object, switch views, and open and close the tool shelf and transform panel. The number pad allowed us to change the views in Blender. The top ortho is displayed on the top left of the screen. The camera view is displayed on the top right of the screen. The front ortho is displayed on the bottom left of the screen. The right ortho is displayed on the bottom right of the screen. Views can be altered using the number pad. I liked how you can easily change views in Blender and do many other things. I didn't like how confusing the program itself was.
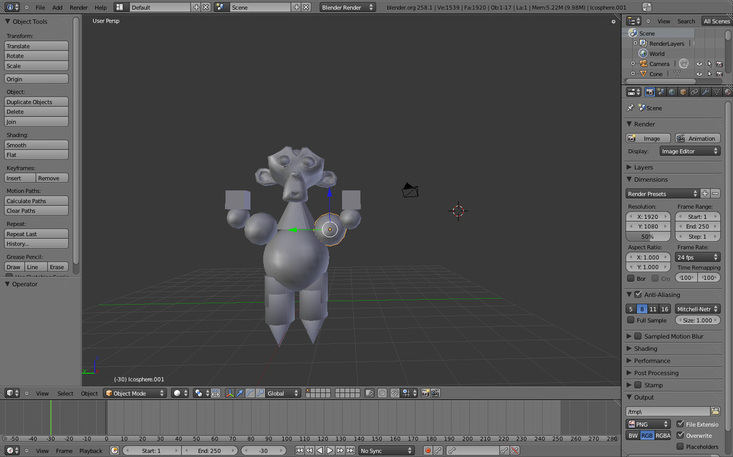
The monkey was created by using the mesh aspect of Blender. I created the monkey sculpture using at least 1 of every type of mesh found in the Add-Mesh menu. Creating the monkey also helped with getting familiar with the commands such as size, rotation, duplicate, transform, etc. We weren't given much direction in creating the monkey. It just had to look somewhat like a monkey with our own flair on it. I liked how Blender had many mesh options to choose from. You can create any character you wanted by just adding different mesh. I didn't like how hard it was to create. I had trouble connecting the body parts together and making it look realistic.
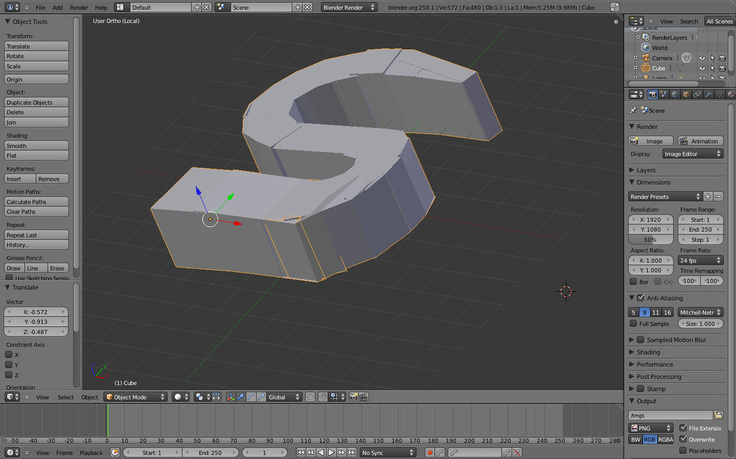
The S shape created in Blender focused on how to extrude shapes, grab the object, rotate it, and scale it. The objective was to create an S as best we could. The shape of the S was lengthened by selecting a group of verticies, then by pressing the "E" key which extrudes the object. I liked how this was something different than the other things we did in Blender. This was much more of a challenge and I liked that I had to focus a lot more on creating this S. I learned how to work with Blender a lot more from doing this assignment. I didn't like how the sizing and scaling was difficult when creating the S shape. I caused a lot of problems for me but I eventually figured it out.
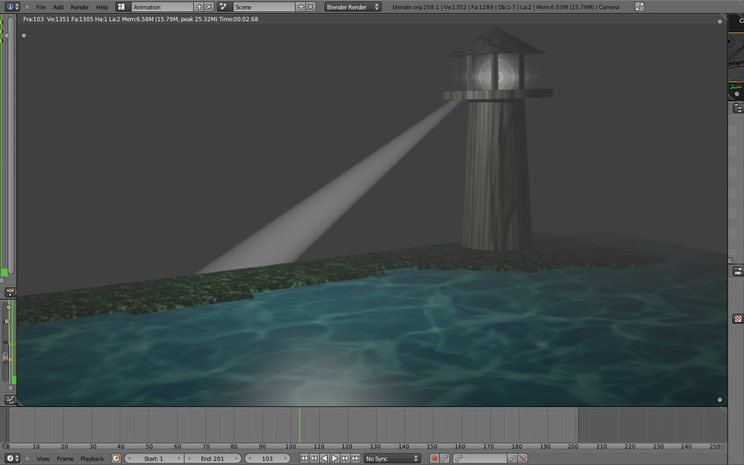
This is the lighthouse project that I created. The objective was to make a realistic lighthouse using Blender and add certain effects to it. We had to make a landscape, water, and add texture to them. We also had to put texture on the lighthouse to make it look more realistic. There was also supposed to be mist in the background to give it some effect. I liked how this project was very challenging and unique. The handouts given in class were very helpful in showing you how to make the lighthouse. Although, I didn't like how much we had to do for the lighthouse. I think adding motion for the light was unecessary, and that would have given me more time to focus on the lighthouse itself. If I could do this project again, I would make more of a hillside terrain, and change up the texture to make it look more realistic.
